Installing McAfee Virus Scan 7.0
For Windows 2000 & XP machines
These instructions show how to install McAfee VirusScan 7.0 for Windows 2000/XP. This version is not compatible with older versions of the Windows OS. Currently we are suggesting a minimum machine requirement of 1 GHz or greater.
The ASC installation package is coming soon and may incorporate some of these final set-up steps therefore reducing the install and configuration time needed to make sure that your machines are protected to the standards recommended by Arts & Sciences.
General Steps
1. Configuring VirusScan Console
2. Checking Virus Definition Dates and Scanning Engine Version
Configuring VirusScan 7.0
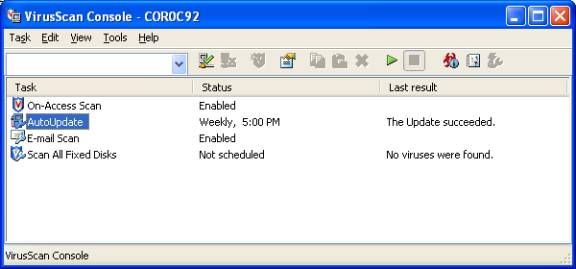
The VirusScan Console (found under Start-Programs-Network Associates-VirusScan Console or by right clicking the McAfee VirusScan Shield in the System Tray) contains the utilities On-Access Scan, AutoUpdate, E-Mail Scan and On-Demand Scan. AutoUpdate can now download HTTP as well as FTP DATs/SuperDATs therefore giving more flexibility to upgrade the engine and definitions.
· To Access the Console:
1. Click “Start”
2. Select “Program Files”
3. Select “Network Associates”
4. Clcik “VirusScan Console”
To work with the Console:
The EPO Server sets all settings; any changes made will
be only temporary until the EPO server resets the settings again. The settings
shown are default application settings for E-mail (no testing has been
conducted) and custom settings for the Antivirus program; these settings have
been tested.
· Console
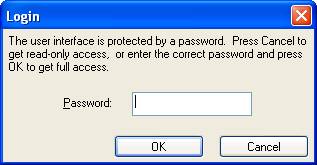
1. Unlock the Console
1. Click Tools
2. Select “Unlock User Interface”
3. Type Password. (please call 305-348-2284)
4. Clcik OK.
Open the VirusScan Console.

· On-Access Scan
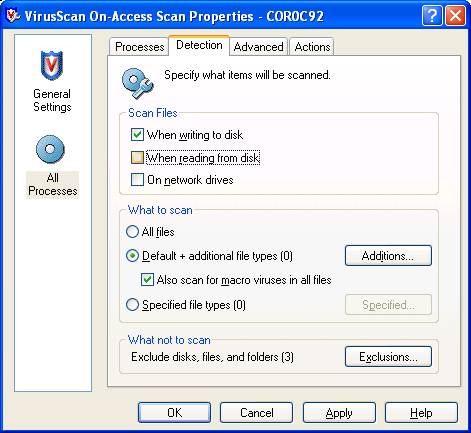
1. Double-click "On-Access Scan" to open up the properties page.
2. Select "All Processes" on the left-hand side.
3. Click "Detection" tab on the top of the page.
4. Verify Uncheck "When reading from disk".
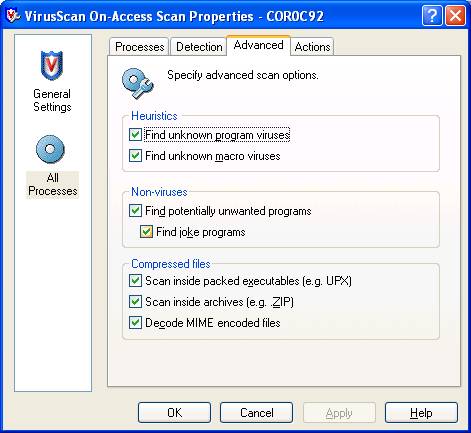
5. Click "Advanced" tab on the top of the page.
6. Verify all options are Checked.
7. Click "Actions" tab on the top of the page.
8. Verify Set options as indicated below.
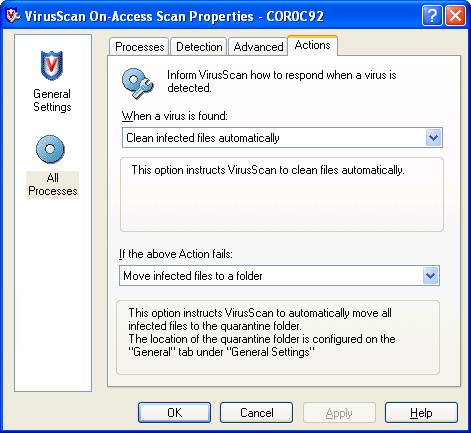
9. Click "OK" to close.
·
AutoUpdate
To schedule a local AutoUpdate follow these Steps:
1. Double-click "AutoUpdate" to open up the properties page.
2. Click "Schedule" on the right-hand side.
3. Click "Schedule" tab on the top of the page.
4. Set it to run Daily starting sometime in the middle of the night and set it to run the missed task (this will allow it to run when the machine is turned on if it was off during the night).
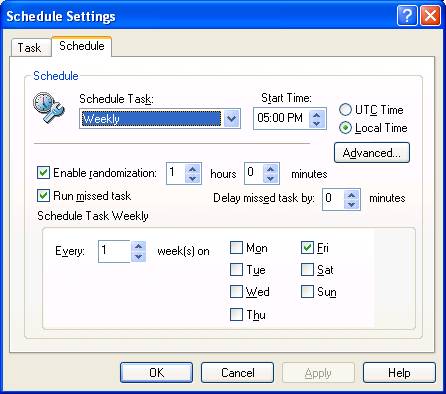
5. Click "OK" to close.
6. The repository list should already be set properly, but to check go to "Tools" on the Console and choose "Edit Repository list". For office setups, the AAS FTP site should be first. For home users, make sure the HTTP choice is first.
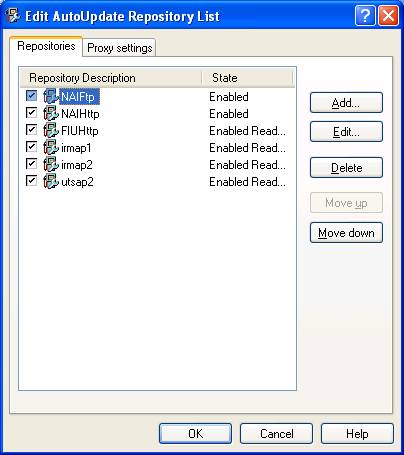
7. Click "OK" to close.
· E-Mail Scan (These are default Settings for E-mail)
1.
Double-click
"E-Mail Scan" to open up the properties page.
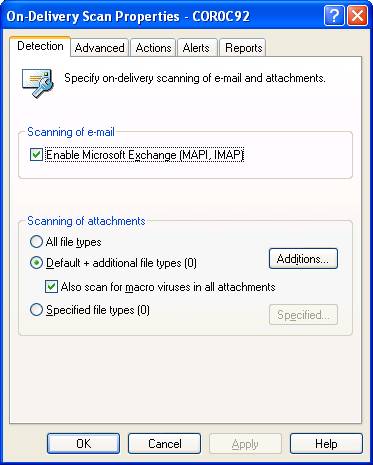
2. Click "Advanced" tab on the top of the page.
3. Check all options on this page.
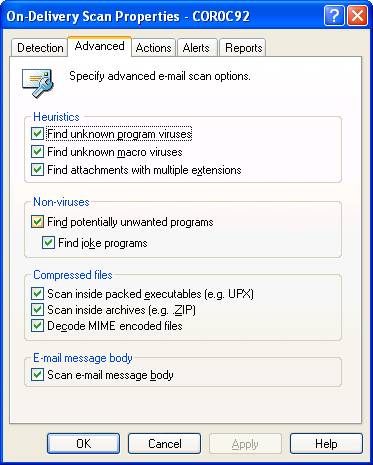
4. Click "OK" to close.
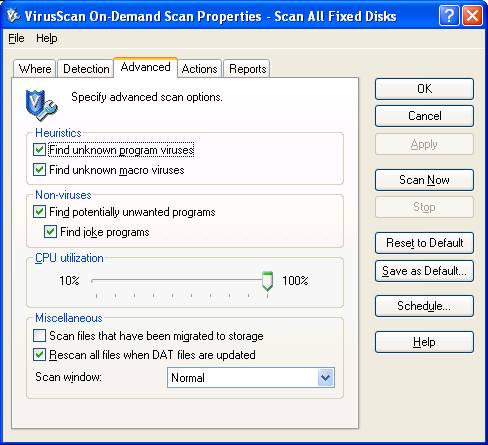
· On-Demand Scan
1. Double-click "Scan All Fixed Disks" to open up the properties page.
2. Click "Detection" tab on the top of the page.
3. Check first two options under "Compressed Files".

4. Click "Advanced" tab on the top of the page.
5. Check all options under Heuristics and Non-Viruses. Bring the CPU Utilization back to 50%, check "Rescan all files when DAT files are updated" then set the Scan Window to run "Minimized".
To Schedule a Scan on the System:
6. Click
"Schedule" button on the right-hand side of the page.
7. In
the resulting "Tasks" page, under the "Schedule settings"
grouping, check the box that says "Enable".
8. Click
"Schedule" tab on top of the page.
9.
Set it to run Daily starting most convenient time for
you and set it to run the missed task with a slight delay(this will allow it to
run when the machine is turned on after being turned off during the night).
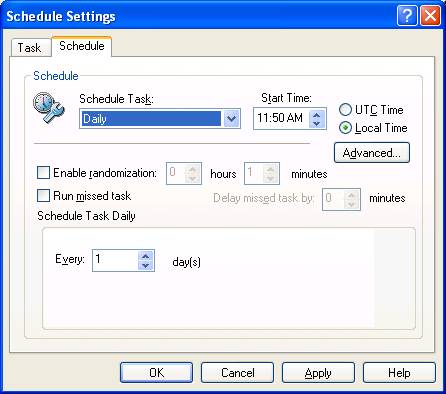
10. Click
"OK" to close.
11. Click
"Save as Default" on the right-hand side.
12.
Click "Yes"

13. Click "OK" to close.
Checking Version Info on VirusScan 7.0
1. Open the VirusScan Console by going to Start-Programs-Network Associates-VirusScan Console or by right clicking the McAfee VirusScan Shield in the System Tray.

2. Go to "Help---About". This will give you a window with all current information on the version installed.
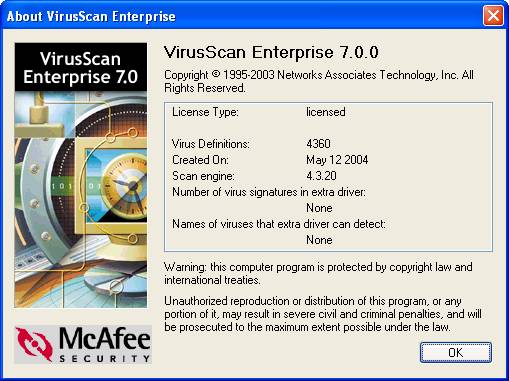
3. Click "OK" to close.
Related Links
· Network Associates Virus Information Library
If you have questions please call UTS Support Center at 305-348-2284.
Last Updated on 05/12 04
By Luis Somoza